Friday, February 28, 2020

New Sale - A - Bration Release


ELEGANT FLOWERING FOILS
Sale-A-Bration is the time to shine; one of our newest Designer Series Paper options can help! You’ll find these rose gold and silver foil designs on the Flowering Foils Specialty Designer Series Paper, available during the Sale-A-Bration Second Release. Add colour or leave as is. You can’t go wrong with paper this beautiful. 
Sale-A-Bration—this amazing paper will be available to you to earn starting 3 March 2020.


Wednesday, February 26, 2020

SALE - A - BRATIONS JOIN


The best value by far only during Sale-A-Bration - Customize your own starter kit!
Stampin' Up! Sale-a-Bration Banner
 
SALE-A-BRATION


RISK FREE DISCOUNTS
 

Hello,

If you are like most stampers, you enjoy sharing your creative ideas and projects. Plus, you love getting an extra-good deal on your favourite crafting supplies. Have you ever considered becoming a demonstrator? I love what I do and I think you'd love it, too! Now is a great opportunity to join my team with our special Sale-A-Bration starter kit bonuses.

Choose $235 in Stampin' Up! products for only $189!

Plus, only during Sale-A-ration, you'll also receive three additional bonus items:
-A new Mini Paper Cutter
-A 6" x 6" Designer Series Paper Sampler
-Your choice of any stamp set offered in current catalogues (host sets and Sale-A-Bration sets excluded)

If you don't think demonstrating is for you, joining to get the discount on your personal purchases is a great benefit. You can enjoy a discount of 20% or more on all future orders. Whether you join to share creativity, hold workshops and earn money, or get a great discount on your orders, we have options. All while doing what you love to do - stamp and share!

Sincerely,
ShonaGai
------

To receive your free Thank you gift for ordering more than $50 but less than $250 through this month you need to enter the following Hostess Code when prompted:

Host Code: GWVN3XAQ

 
  STARTER KIT   
 
 
Promotion
 
AMAZING VALUE!
So let's recap - For only $189:

Choose up to $235 of any Stampin' Up! products of your choice for your kit. Choose from current catalogues, bundles, and Clearance Rack.

The Sale-A-Bration special kit also includes 3 bonus items: a Mini Paper Cutter, 6" x 6" Designer Series Paper Sampler, and a stamp set of your choice from any current catalogue (excludes Host sets and Sale-A-Bration rewards).

20% discount! Enjoy a minimum of a 20% demonstrator discount every day.

Free Shipping! The starter kit ships FREE for another 10% savings.

No risk! You'll have through the end of your first full quarter (June 2020) to "test drive" demonstrator discounts and benefits.

No penalty! If you reach $467.00 in sales during April-June, you automatically remain active for another quarter. If you don't reach $467.00 in sales, you can "drop" with no penalty, and you keep everything from your Starter Kit.

No catch! There's no obligation to hold workshops or parties, sell products to others or personally purchase anything beyond the kit.

 
IT'S AN AMAZING VALUE!
 
    Customize Your Kit    
 
 
SHOP ONLINE
 
 
PARTY & EARN
 
 
JOIN THE FUN


Contact Icon Button
 
ShonaGai
Gold Coast, Queensland, Australia
 
Contact Icon Button
 
call me
0414342001
Contact Icon Button
 
email me
shonagai.anthony@icloud.com


Facebook - ShonaGai Instagram - ShonaGai Pinterest - ShonaGai
 
 
You have received this email because you are a friend of mine, you have subscribed to my newsletter list, purchased products from me, or attended an event I hosted. If you no longer wish to receive emails please unsubscribe using the link below.
 
 2020 | Images © Stampin' Up!
 

Monday, February 24, 2020

Card Layout


Best Dressed Spotlight - ShonaGai
 
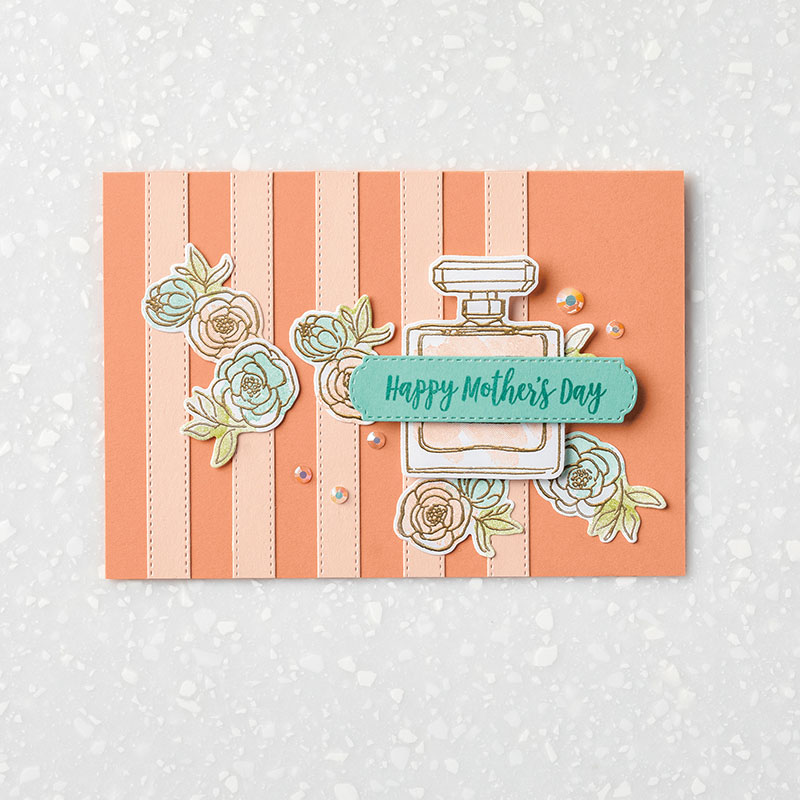
Dressed To Impress - Mother's Day Note Card
 
Mother's Day Note Card
 
INSTRUCTIONS:
  1. Cut Grapefruit Grove cardstock to 5" x 7". Score at 3-1/2" along the 7" side. Fold to create the note card.
  2. Die cut a scrap piece of paper that is at least 4" long into six strips using the purse handle/strip die from the All Dressed Up Dies. 5 strips will be used on the card and 1 will be used for spacing.
  3. Place one strip, without adhesive along the left edge of the card front as a spacing template. Hold it in place and adhere a strip next to it with the excess length off the top and bottom of the card. Move the template strip to the right side of the strip you just glued down. Repeat until you have 5 strips adhered to the card front. Trim off excess length even with the top and bottom edges of the card.
  4. Next, use Gold Stampin' Emboss Powder to heat emboss the perfume bottle and flower images from the Dressed To Impress stamp set. Start by rubbing the Embossing Buddy over Whisper White cardstock to reduce static.
  5. Stamp the perfume bottle with VersaMark ink on Whisper White cardstock. Cover generously with Gold Stampin' Emboss Powder. Tap off excess powder. Carefully use the Heat Tool to heat emboss the image.
  6. Repeat the steps to heat emboss three of the small single flower images and three of the double flower images.
  7. Use the watercolor wash stamp images from the Dressed To Impress stamp set to "colour in" the perfume bottle and flower images. To get a soft effect, ink the stamp and stamp off once on scrap paper before stamping onto the embossed image. Use stamped off Granny Apple Green for the leaves. Use stamped off Coastal Cabana for the larger single flowers and the smaller double flowers. Use stamped off Grapefruit Grove ink for the perfume bottle and larger double flowers.
  8. Die cut flower and perfume bottle images with the coordinating All Dressed Up Dies.
  9. Adhere die cut flowers to card front with Mini Glue Dots and the die cut perfume bottle with Stampin' Dimensionals.
  10. Stamp greeting from Dressed To Impress stamp set onto Coastal Cabana cardstock with Bermuda Bay ink. Die cut greeting with label die from the All Dressed Up Dies. Adhere across perfume bottle.
  11. Use the Fine-Tip Glue Pen to or Multipurpose Liquid Glue to adhere From My Heart Faceted Gems to the card.

SUPPLIES:

STAMPS: Dressed to Impress (#151666)
CARDSTOCK: Whisper White (#100730), Coastal Cabana (#131297), Grapefruit Grove (#146972), Petal Pink (#146985)
PAPER: None
INK: VersaMark (#102283), Granny Apple Green (#147095), Bermuda Bay (#147096), Coastal Cabana (#147097), Grapefruit Grove (#147142)
ACCESSORIES: Stampin’ Emboss Powder Gold (#109129), From My Heart Faceted Gems (#151154)
ADHESIVES: SNAIL (#104331), Stampin' Dimensionals (#104430), Mini Glue Dots (#103683), Fine-Tip Glue Pen (#138309) or Multipurpose Liquid Glue (#110755)
TOOLS: All Dressed Up Dies (#151665), Heat Tool (#129053), Embossing Buddy (#103083)


TIPS: Rub the Embossing Buddy over paper before heat embossing to reduce static. This helps prevent stray bits of embossing powder from sticking where you don't want them.
 
 
BEST DRESSED SUITE VIDEO
 
DOWNLOAD THE CATALOGUE
 
The Mini Catalogue Inspiration


Facebook - ShonaGai Instagram - ShonaGai Pinterest - ShonaGai


Friday, February 21, 2020

CREATE

COORDINATION JUST GOT BETTER
Do you have a favourite stamp set or punch from the Sale-A-Bration Brochure or the
January –June 2020 Mini Catalogue?
We do too! Now is your chance to coordinate them with the Coordination Product Release! Specifically designed to coordinate perfectly with products from the Sale-A-Bration Brochure or
the January–June 2020 Mini Catalogue, these will not disappoint you. 


Wednesday, February 19, 2020

February Tutorial


ShonaGai - Peaceful Poppies Elements Tutorial
Stampin' Up! News from ShonaGai
Stampin' Up! Inspiration Project
 
Hello,

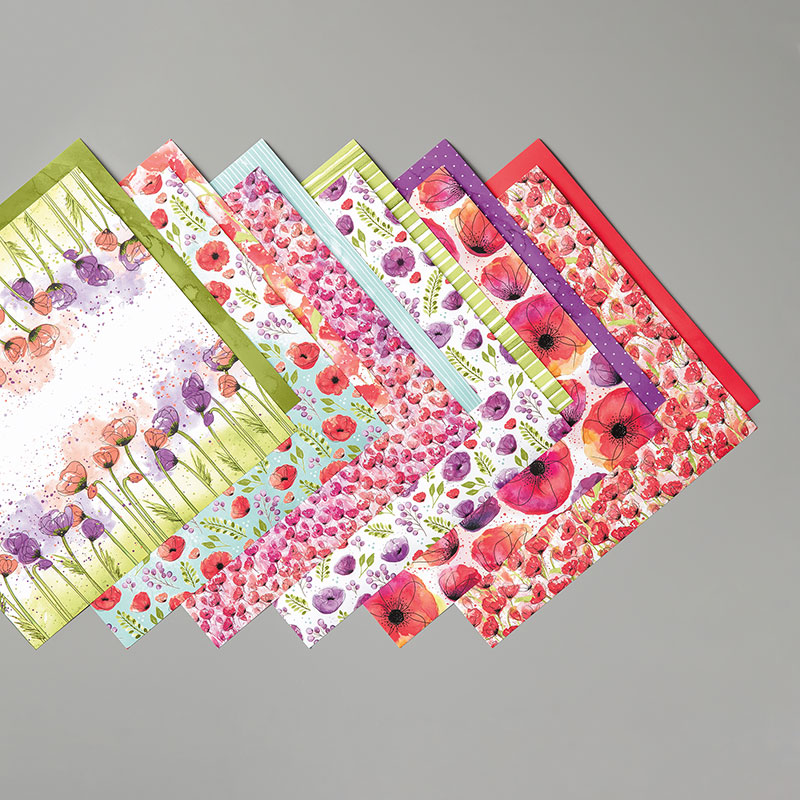
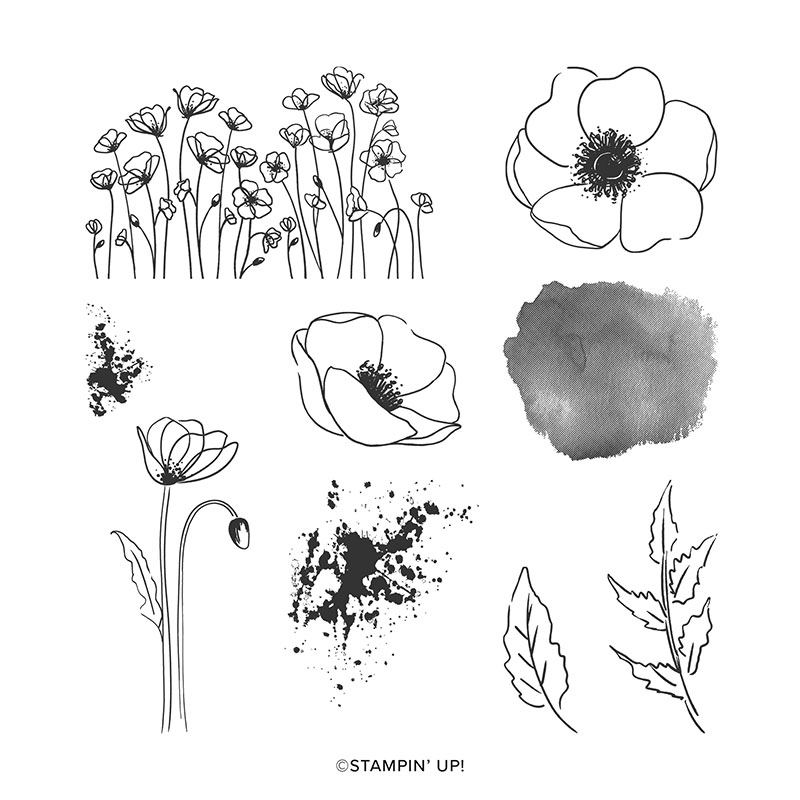
It may not feel like it, but Winter is just around the corner. I'm shaking off the wet weather blues by creating with some gorgeous new floral stamps from the Mini Catalogue. I think you'll love the style and luxurious colours of the Peaceful Poppies Suite as much as I do.

This is actually a mega-suite, meaning it has two stamp sets and two die sets, plus lots of other awesome coordinating accessories. One of the items from this suite is a hidden gem that I'm showcasing in this month's tutorial, so check it out below!

Have you seen the newly released Coordinating Products that go with favourites from the Mini and Sale-A-Bration catalogues? I love how these products are designed to make it easier to create with, and step-up the style, of some of our most popular new products.

Sincerely,
ShonaGai
------

To receive your free Thank you gift for ordering more than $50 but less than $250 through my Online Store this month you need to enter the following Hostess Code when prompted:

Host Code: GWVN3XAQ


P.S. Sale-A-Bration is about half way through, so make sure you shop and get your reward items soon. It's not too late to schedule to host and earn extra rewards, but don't wait as my dates are filling up quickly!

Peaceful Poppies Elements Tutorial


Stampin' Up! Inspiration Project
 
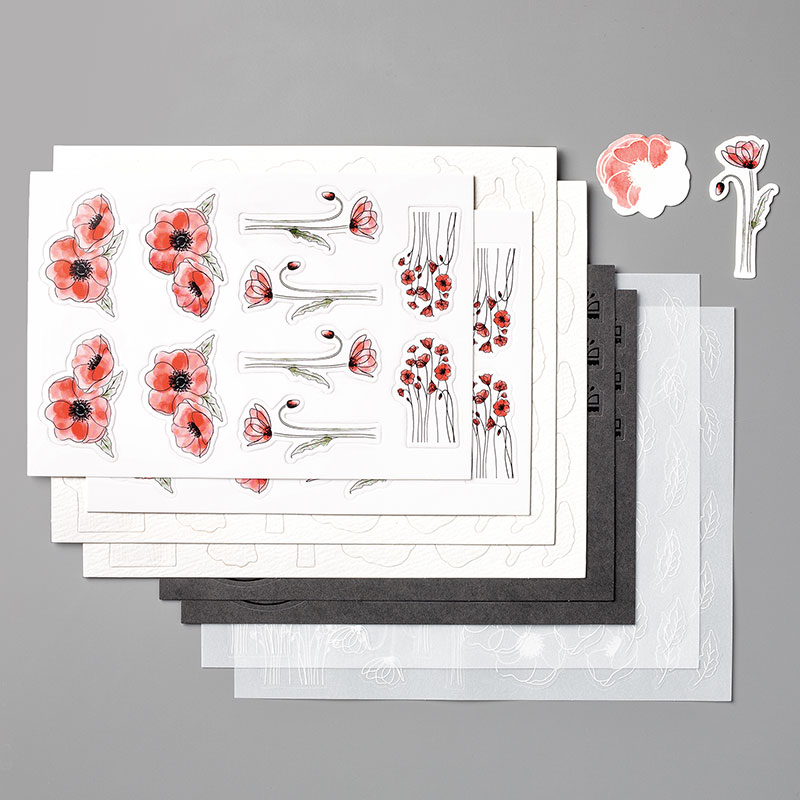
Even a Mini Catalogue can have hidden gems tucked away in it's pages! The Peaceful Poppies Elements are a crafting treasure just waiting to be discovered. This little kit packs a big punch at a small price. It includes 8 sheets of die-cut printed accents that coordinate with the Peaceful Poppies suite.

These aren't your run-of-the-mill die-cuts either. You get a whole selection of die cut images, shapes, and labels with embossing, foil accents, coloured images, and printed vellum that make it quick and simple to step-up the style on your projects.

Plus, if you are wanting to up the artistry, these elements are great for techniques like coloring, embossing, emboss resist, and more.

This tutorial shares how to create 3 note cards that showcase 5 fantastic ways to use the Peaceful Poppies Elements!

Peaceful Poppies Elements: 8 sheets total
* 2 sheets black die-cut elements with black foil prints: labels, banners, borders
* 2 sheets white thick cardstock die cuts with colored prints: poppies
* 2 sheets vellum die cuts with white prints: poppies and leaves
* 2 sheets watercolor paper die cuts with clear UV prints for watercoloring: poppies and leaves

Stampin' Up! Inspiration Project

1. Heat Emboss

Pop out a black foiled cardstock circle from the Peaceful Poppies Elements kit. Rub with the Embossing Buddy. Stamp greeting from the Sale-A-Bration Sending You Thoughts stamp set with VersaMark ink. Cover with White Stampin' Emboss Powder. Tap off excess and heat emboss using the Heat Tool.
Stampin' Up! Inspiration Project

2. Embellish Note Card 1

Start with a pre-cut and pre-scored Whisper White Note Card. Cut a 1-1/2" x 5" strip of Peaceful Poppies Designer Series Paper. Adhere 1/8" from left edge of card. Adhere embossed black circle to card front with Stampin' Dimensionals. Pop out a pre-coloured poppies from an elements sheet and adhere as a coordinating accent using Stampin' Dimensionals.
Stampin' Up! Inspiration Project

3. Watercolor a Poppy

Pop out a watercolor paper poppy from the elements sheet. Brush water inside the embossed outline. Use Pumpkin Pie and Mango Melody inks and an Aqua Painter to watercolor the flower. Allow to dry.
Stampin' Up! Inspiration Project

4. Stamp & Diagonal Accents

Cut a 1" x 4" piece of Peaceful Poppies Designer Series Paper. Stamp greeting with Tuxedo Black Memento ink. Adhere strip at a diagonal across a pre-cut note card. Pop out a black foiled scallop strip. Adhere alongside paper strip. Trim off excess at edges of card with Paper Snips.
Stampin' Up! Inspiration Project

5. Embellish Note Card 2

Adhere watercolored poppy to top right of diagonal strip with Stampin' Dimensionals. Tie a bow with Whisper White 1/4" Crinkled Seam Binding Ribbon. Adhere below poppy with a Glue Dot.
Stampin' Up! Inspiration Project

6. Colour Vellum Poppy

Pop out a vellum poppy from the elements sheet. Flip it over so the white embossing is face down. Color the poppy with Light and Dark Poppy Parade Stampin' Blends. Color the center with the dark and blend out to the edge with the light.
Stampin' Up! Inspiration Project

7. Stamp & Layer

Ink the splatter stamp with Smoky Slate ink. Stamp off once and stamp onto the corner of a pre-cut note card. Repeat for all four corners. Layer 2" x 5" stripped Peaceful Poppies Designer Series Paper onto 2-1/4" x 5" Poppy Parade cardstock. Adhere to card front.
Stampin' Up! Inspiration Project

8. Embellish Note Card 3

Stamp greeting on Whisper White cardstock with Tuxedo Black Memento ink. Punch out with Label Me Fancy Punch. Punch scrap Smoky Slate with Label Me Lovely Punch. Layer punched greeting off center to the left of the larger punch. Add a "V" of Whisper White 1/4" Crinkled Seam Binding Ribbon behind labels. Add label to card with Stampin' Dimensionals. Add the coloured vellum poppy with a single Stampin' Dimensional hidden behind the embossing in the center.
 

SUPPLIES


Peaceful Poppies Elements  
Peaceful Poppies Designer Series Paper
Country Club Designer Series Paper

Peaceful Poppies Elements

#151327
 

Peaceful Poppies Designer Series Paper

#151324

Country Club Designer Series Paper

#151599
 

Current Promotions


Monthly Promotion
 
Monthly Promotion


Friday, February 14, 2020

Best Dressed Suite

Best Dressed Spotlight

Hello,

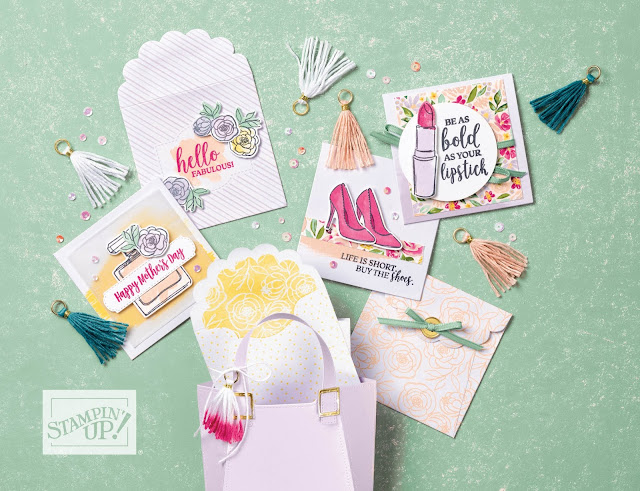
Celebrate your inner diva in style with the Best Dressed Suite! This fun and flirty Dressed To Impress stamp set includes images and sassy greetings to help you create the ultimate in fashionable paper crafting.

The All Dressed Up Dies include dies that coordinate with the stamp images, plus dies to make an awesome 3D purse! This bundle is one you'll want to add to your spring fashion collection now and will continue to enjoy season after season.

The note card project highlights an unexpected use for the purse handle die from the All Dressed Up Dies, heat embossing, and the stamping off technique. The soft colours and fashionable floral and stripe design are perfect for spring occasions. Make this card for Mother's Day, bridal showers, birthdays, and much more!

Sincerely,
ShonaGai
------
To receive your free Thank you gift for ordering more than $50 but less than $250 through my Online Store this month you need to enter the following Hostess Code when prompted:

Host Code: 7D9DKBCV

Tuesday, February 11, 2020

Kylie's Demonstrator Training Program Monthly Blog Hop


Hello,

Today I am hopping with the demonstrators from Kylie Demonstrators Training Group.  
This is my first hop with this group, I am enjoying training and learning lots of new things.

Today I made a card using the Good Morning Magnolia Cling Stamp as my feature on this card.


Card Recipe:

Card Base: 
Whisper White Think Cardstock ~ 27 x 13.4cm, scored at 13.5 cm

Card Front: 
           Perennial Essence Vellum ~ 12.5 x 12.5cm and a strip 5cm x11cm
           Whisper White Think Cardstock ~ 11.5 x 11.5cm, then embossed with Scripty 3D Embossing Folder
          ~Two stamp images of the Good Magnolia Stamp and coloured with the blenders as listed below
         ~A trio of Frosted and Clear Epoxy Droplets


Thank you for Visiting my Blog, please check out all the other wonderful creations. 


Product List
Back to Top